


【使える機能】Photoshop ハイパスとは?
2017年07月31日
いいね! 0
0
0
3,291 views♪

今回は、たまに聞かれることがあるハイパスってなに![]()
ということについてご説明いたします![]()
私はいつも「ぼやけてたものが鮮やかにシャープになる![]() 」って答えてます
」って答えてます![]()
前回の記事のようなレタッチにも使える機能![]()
簡単にご紹介いたします![]()
![]()

【Photoshop】
ハイパス


まずは、こちらの画像を用意しました![]()

かっこよく![]() 並んでますね
並んでますね![]()
![]()
この画像にハイパスをかけてみます![]()
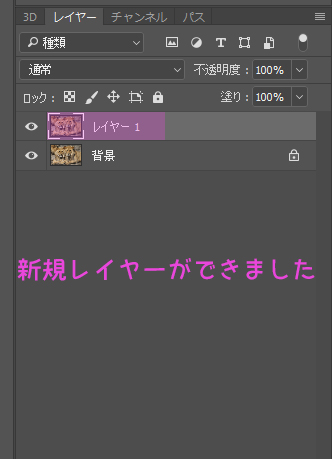
まず、ハイパスをかけるレイヤーを作成したいので![]()
![]() +
+![]() で画像レイヤーをコピーします
で画像レイヤーをコピーします![]()
そして、フィルター>その他>ハイパスへと進みます![]()
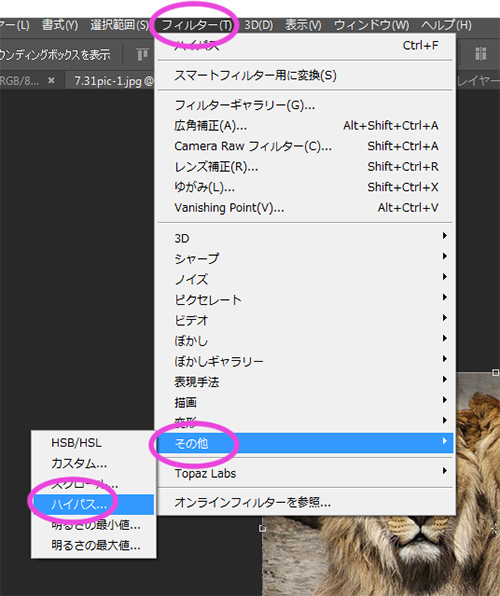
すると、パネルがでてくるのですが![]()
![]()
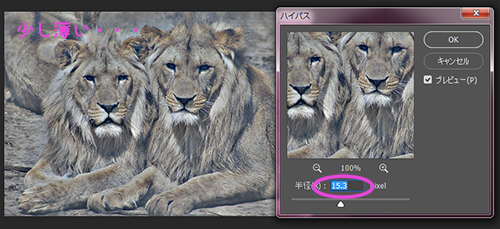
設定する数値によって、写真の仕上がりが違ってきます
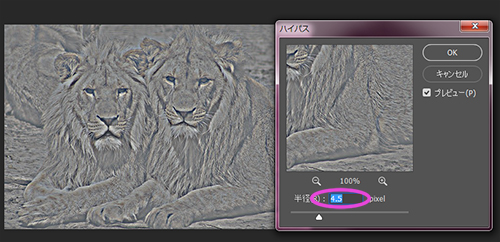
以下のような高めの数値にすると
用途によってはこういう数値を設定するときもありますが![]()
![]()
画像を鮮やかに少しシャープにしたい時は、わりと以下のような5くらいの数値で設定することが多い![]()
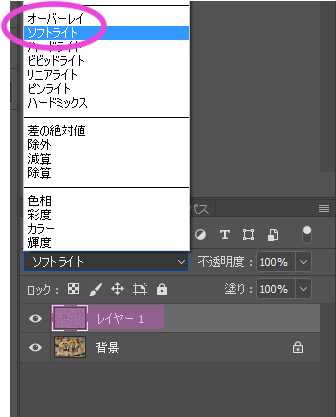
そして、今ハイパスをかけたレイヤーのブレンドモードをソフトライトやオーバーレイなどにします![]()
私はわりとソフトライトに設定することが多いです![]()
![]()
たったこれだけ
できあがりは

こんな感じになります![]()
できあがりが少しきつい場合は、ハイパスレイヤーの不透明度を調整してみてくださいね![]()
![]()
![]()


★こちらも人気です★


カテゴリー: 【Photoshop 写真加工】, 【Photoshop】使える機能
タグ:adobe, photoshop, photoshop チュートリアル, photoshop 機能, 写真加工, 画像加工
タグ:adobe, photoshop, photoshop チュートリアル, photoshop 機能, 写真加工, 画像加工
←「Photoshop プロの技!
肌をきれいにレタッチする方法」前の記事へ
肌をきれいにレタッチする方法」前の記事へ
次の記事へ「【Photoshop】 選択機能一覧」→